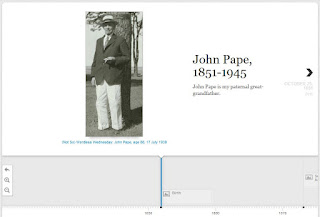
I made my first timeline with TimelineJS using my blog posts on Saturday, and I just can't get over how easy it is! So easy, that I made another one today, this time on my paternal great-grandfather:
This was pretty easy to do. You start with a Google Drive spreadsheet. TimelineJS has a template you can download. Here is how part of mine looked:

There are columns for dates (start and end), a headline and text, whatever media you are linking to, captions and credits, and thumbnails for the media, slide type (such as the title slide), and tags (you can have up to six). The media can be can be a link to a YouTube, Vimeo, SoundCloud, Dailymotion, Instagram, Twitter (pic or status), Google+ status, Wikipedia, Flickr, Google Maps and Docs, Vine, or an image (such as one in a blog post). You can also put a quotation in as media, too, with the HTML blockquote tags.
I'm using the media caption slide to create a link to my blog posts. Only the start date and headline are required fields. I may experiment with tags (which can be used to create categories within the timeline) later.
Once you have your spreadsheet set up, the next step is to publish the spreadsheet to the web. You want to make sure to check the box next to “Automatically republish when changes are made.” This way, you can add events (from later blog posts, for example) to the spreadsheet later, and the timeline will automatically be uploaded.
Step 2 produces a URL that you then paste into the designated box on Step 3 of the TimelineJS website. There are some options you can choose from (different font combinations, for example, or for code for a Wordpress.org blog - note that TimelineJS won't work on blogs hosted on Wordpress.com). You then grab the embed code and paste it in your blog or website - and you have a beautiful timeline!
I like this so much, I have set up a separate Timelines page on this blog, to store all my timelines!

© Amanda Pape - 2013 - click here to e-mail me.
This was pretty easy to do. You start with a Google Drive spreadsheet. TimelineJS has a template you can download. Here is how part of mine looked:

There are columns for dates (start and end), a headline and text, whatever media you are linking to, captions and credits, and thumbnails for the media, slide type (such as the title slide), and tags (you can have up to six). The media can be can be a link to a YouTube, Vimeo, SoundCloud, Dailymotion, Instagram, Twitter (pic or status), Google+ status, Wikipedia, Flickr, Google Maps and Docs, Vine, or an image (such as one in a blog post). You can also put a quotation in as media, too, with the HTML blockquote tags.
I'm using the media caption slide to create a link to my blog posts. Only the start date and headline are required fields. I may experiment with tags (which can be used to create categories within the timeline) later.
Once you have your spreadsheet set up, the next step is to publish the spreadsheet to the web. You want to make sure to check the box next to “Automatically republish when changes are made.” This way, you can add events (from later blog posts, for example) to the spreadsheet later, and the timeline will automatically be uploaded.
Step 2 produces a URL that you then paste into the designated box on Step 3 of the TimelineJS website. There are some options you can choose from (different font combinations, for example, or for code for a Wordpress.org blog - note that TimelineJS won't work on blogs hosted on Wordpress.com). You then grab the embed code and paste it in your blog or website - and you have a beautiful timeline!
I like this so much, I have set up a separate Timelines page on this blog, to store all my timelines!

© Amanda Pape - 2013 - click here to e-mail me.


